If you do not have an AACA WordPress site and would like one, please contact us by emailing Pat Buckley or by calling us at the
AACA Headquarters 717-534-1910
Getting Started
Use the Menu on the Right-Hand Side for other Tutorials
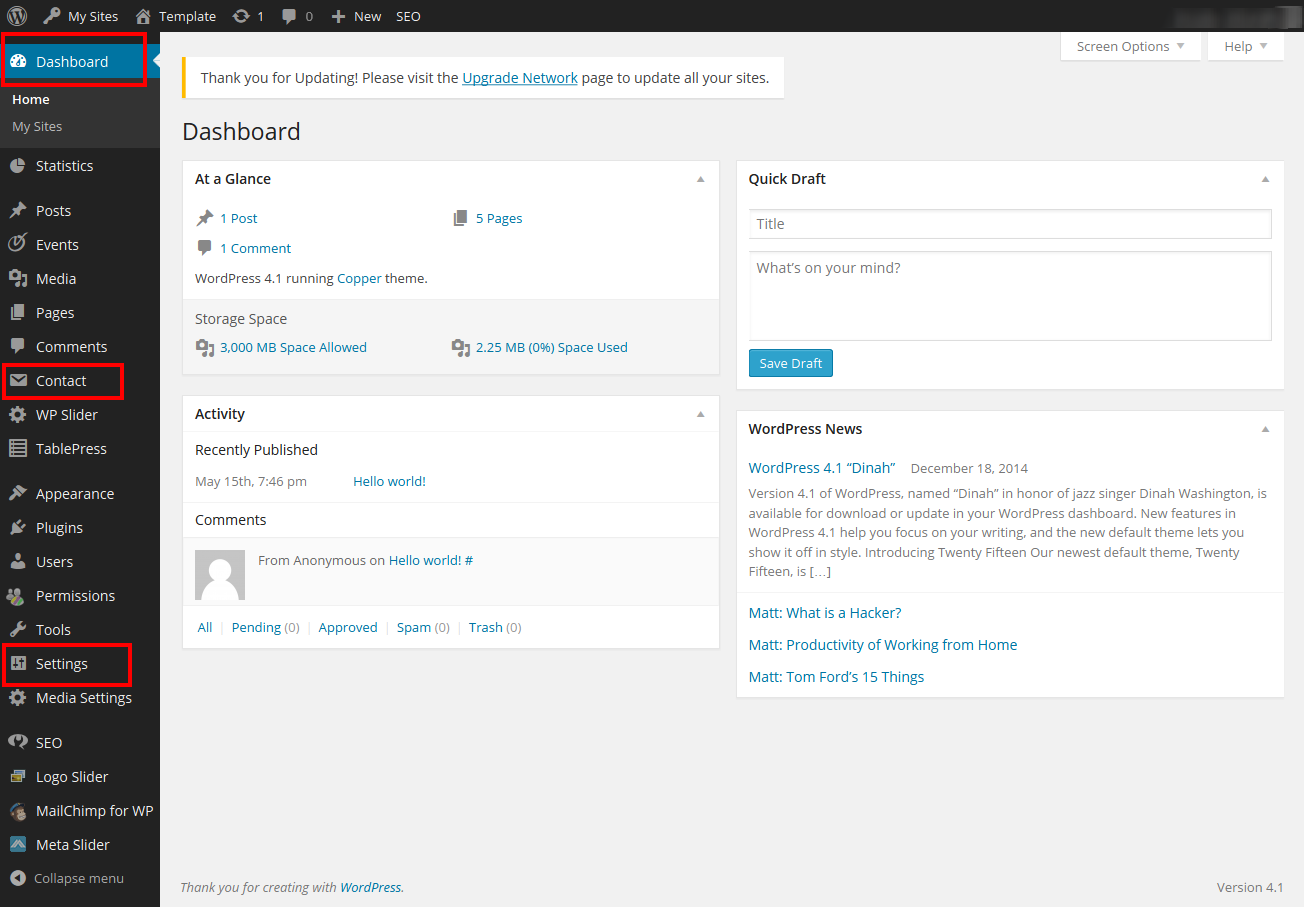
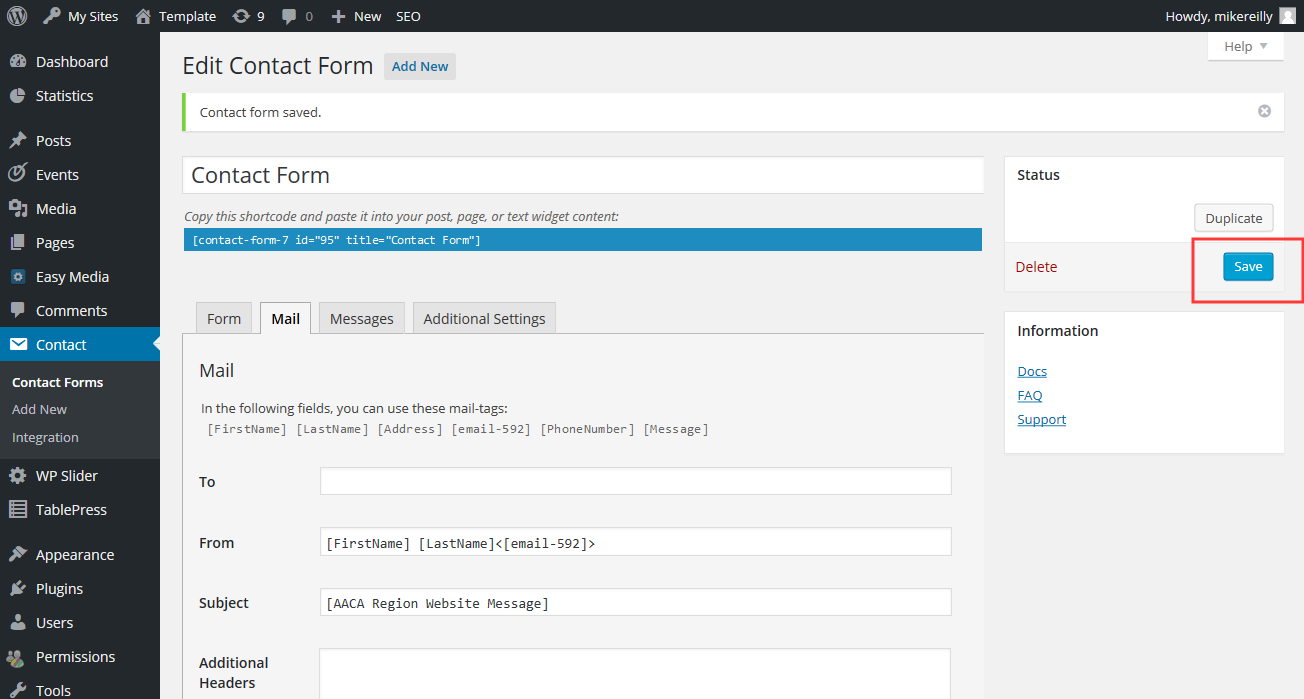
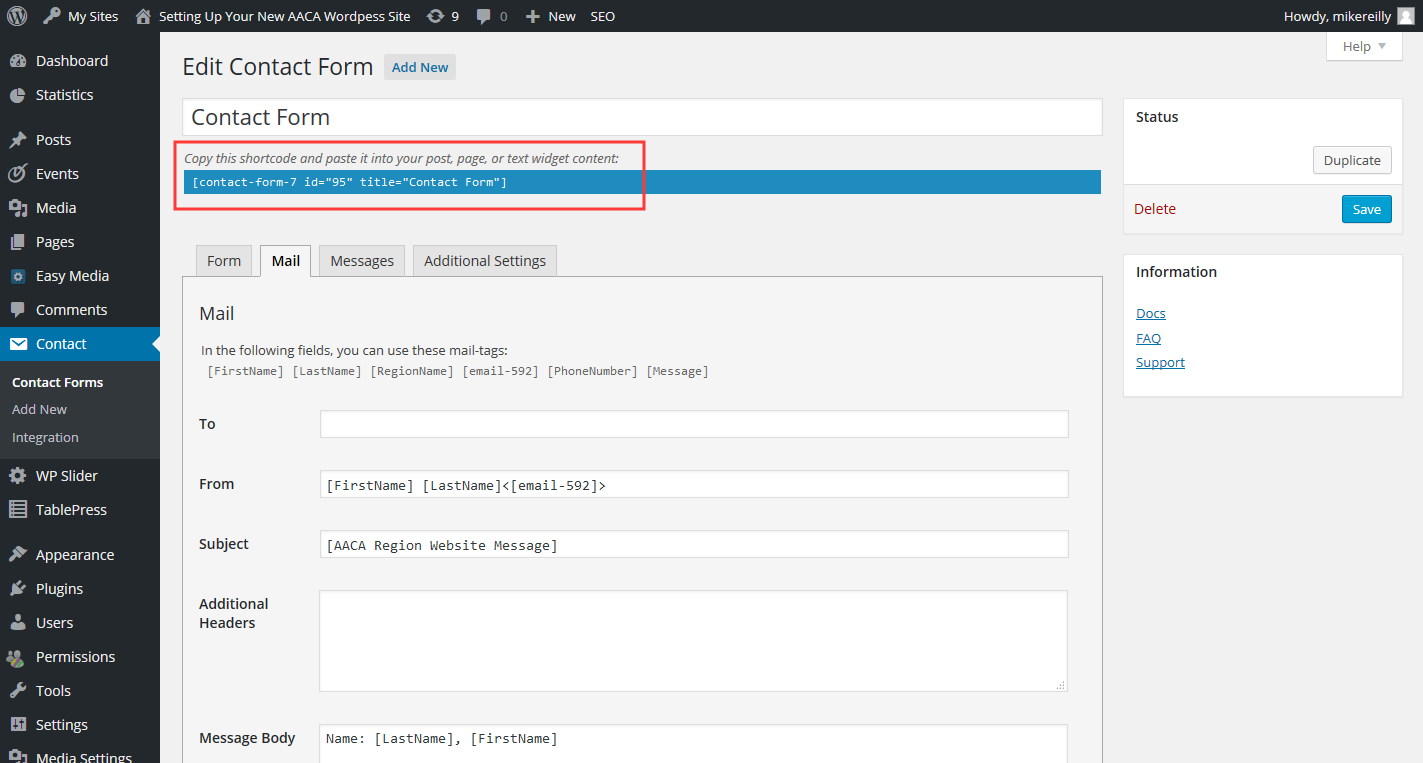
Add your new Admins Email and Site Settings
- Click the Settings tab on the left side “Dashboard” area
- Click Settings or Hover and Click General
- Edit the Information on the page that opens
- The Site Title should reflect your regions name
- The tagline is a short description of the site or region (this can be left empty if you choose)
- Change the admin’s email to your email or the admin’s email if it is not you
- Edit any other settings that may need to be changed
- When done click “Save Changes” at the bottom of the page
Editing the Contact Page
- Click Contact or Contact Forms on the left side “Dashboard” area.
- When the contact page loads, click the form titled Contact Form
- The page that loads contains the criteria that users will see on the webpage. These are the items that need to be filled in by users on the contact form. These are editable but have been set up to a default which should serve your purposes fine. Visit the Plug In Developer for more info.
- Click on the Mail tab along the top.
- Edit some of the boxes to fit your needs. See this image for info.
- Fill in the admins email address in the “To” box. All email via the contact page will forward to this email address.
- If necessary change the “From” line to [FirstName] [LastName]<[email-592]>
- If necessary change the “Subject” Line to [AACA Region Website Message] You can change the word region to your region name if you’d like
- Remember to click Save when you are finished.
- This contact form has already been saved and set to your contact page. If you would like to add the contact form to another page or create a separate form for another use all you do is copy the shortcode link and paste it onto the page you want the contact form to appear.
Pages
- Click the Pages tab on the Dashboard area of the back end.
- This will bring you to all the pages created for your site.
- We have created some basic pages to help you get started. You can modify and use these pages or delete/remove them if you choose not to use them.
- This is also where you create new pages for content.
- Visit the WordPress Help Document to Learn More About Pages.
Edit your Homepage
- Click pages on the left side “Dashboard” area
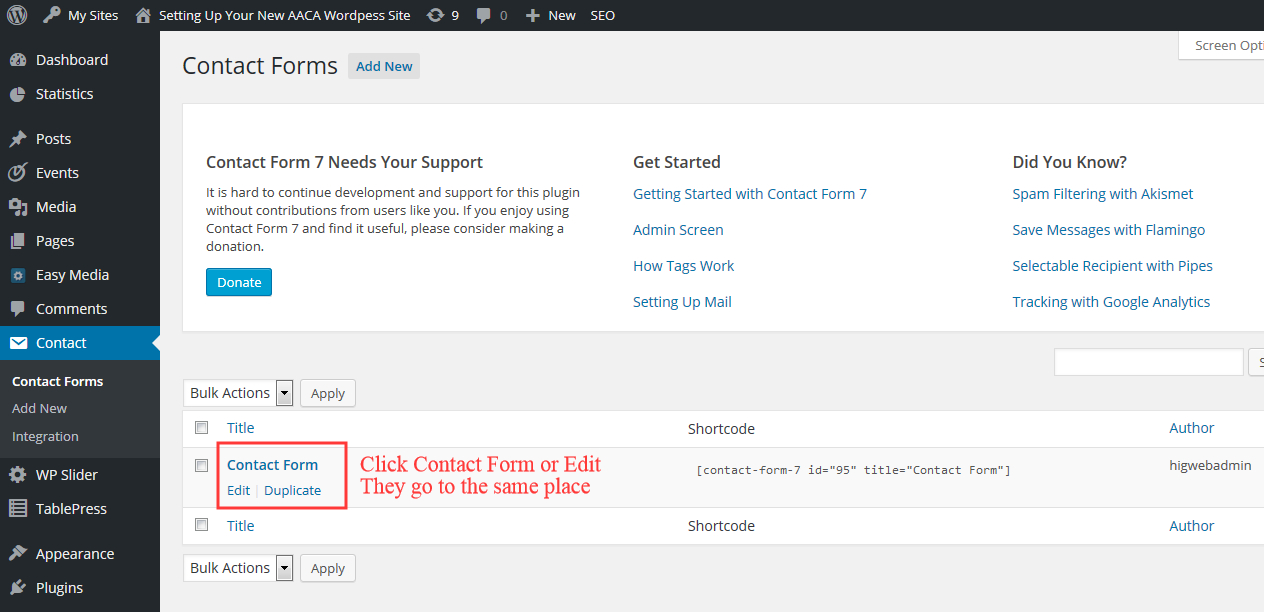
- Find and click on the page titled “Welcome to the (insert region name here) Region” (You can also click Edit underneath it)
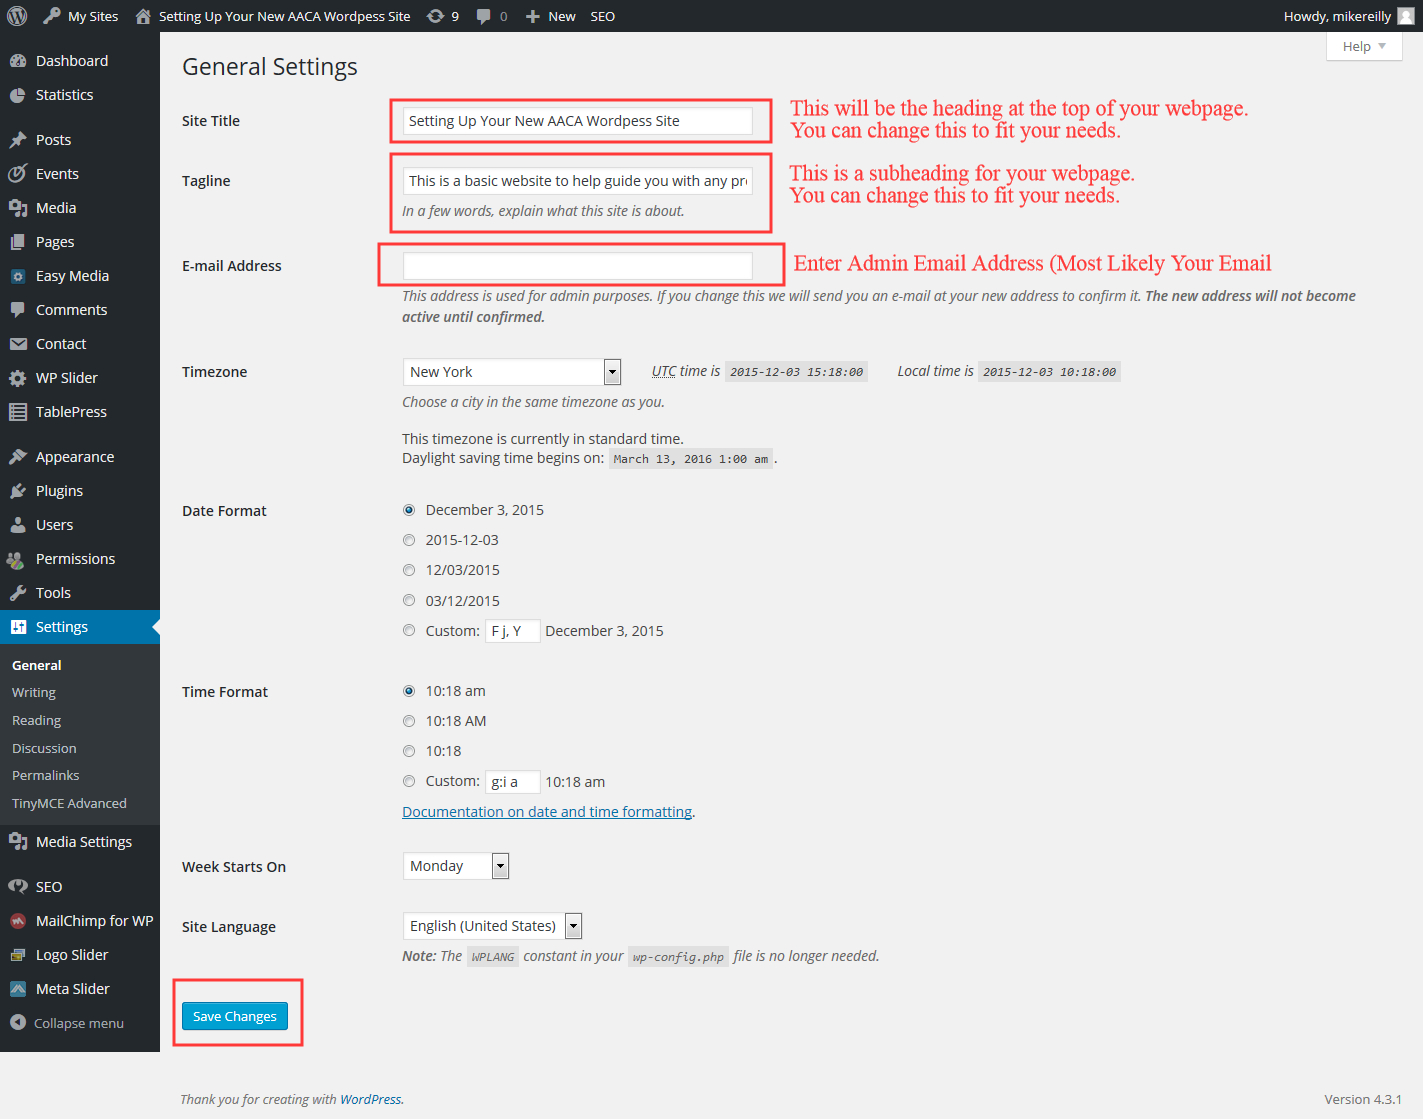
- Change the title to reflect your region name or use another heading title that you wish to use. If you change this title, it will be the new name of the page and will be reflected in the “page” settings as this new title.
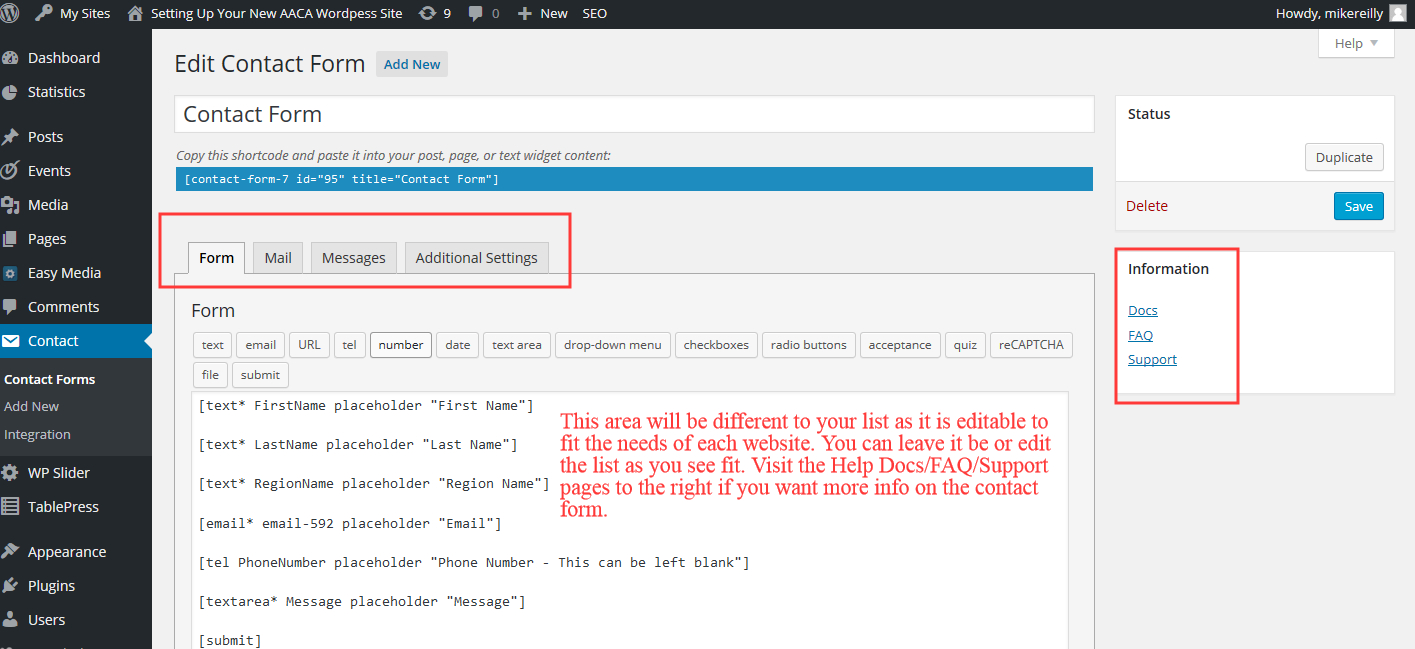
- You can also edit the text area to place images or other information about your region in the page editor that loads when you edit the page.
News
- The news section of your new page can be edited by clicking ”Posts” on the Dashboard area
- By clicking “Add New” you can easily update your news section by typing your news into the editor. You can even upload photos with this. This will automatically add your new post to the news page after hitting “Publish”
Calendar
- You can add events to your calendar page by clicking the “Events” tab on the Dashboard
If you would like to know more contact us by emailing Pat Buckley
You can also call and ask for one of us at headquarters 717-534-1910