View the Tutorial supplied by the Meta Slider Developer By Clicking Here or Read Below
See the Slide Show at the bottom of this page as an example of it working.
Creating A New Slide Show
- Scroll to the bottom of the Dashboard area and find the Meta Slider Plugin Tab along the bottom left-hand side of the Dashboard/Back End of your site and click the Meta Slider button.
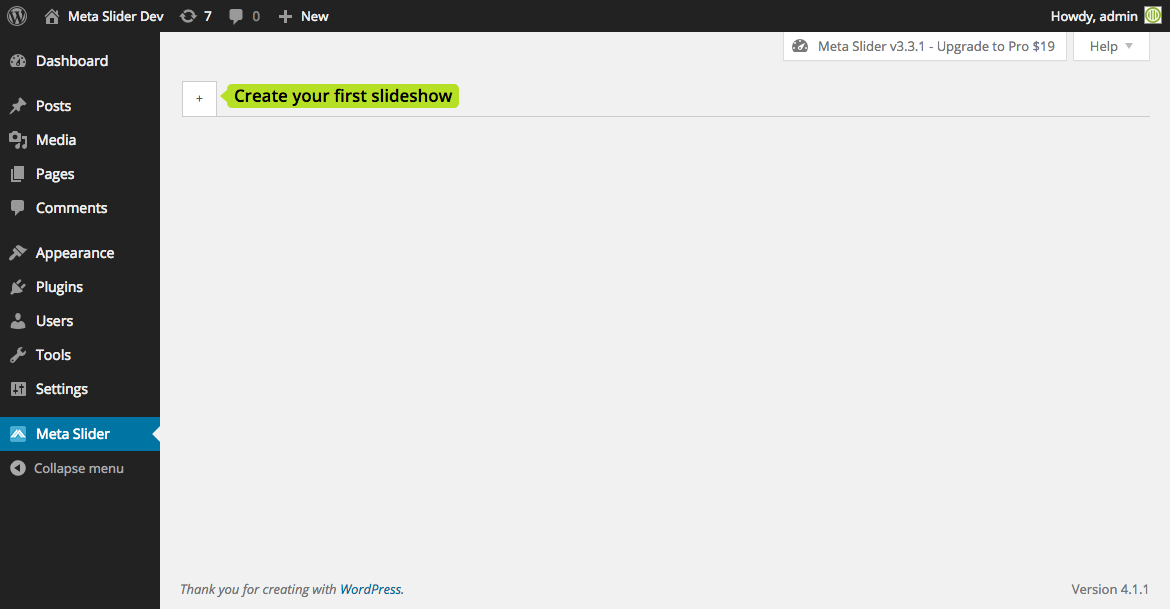
- If you are creating a slideshow for the first time your Meta Slider Page will look like this. Click the + button along the top to create a slide show.
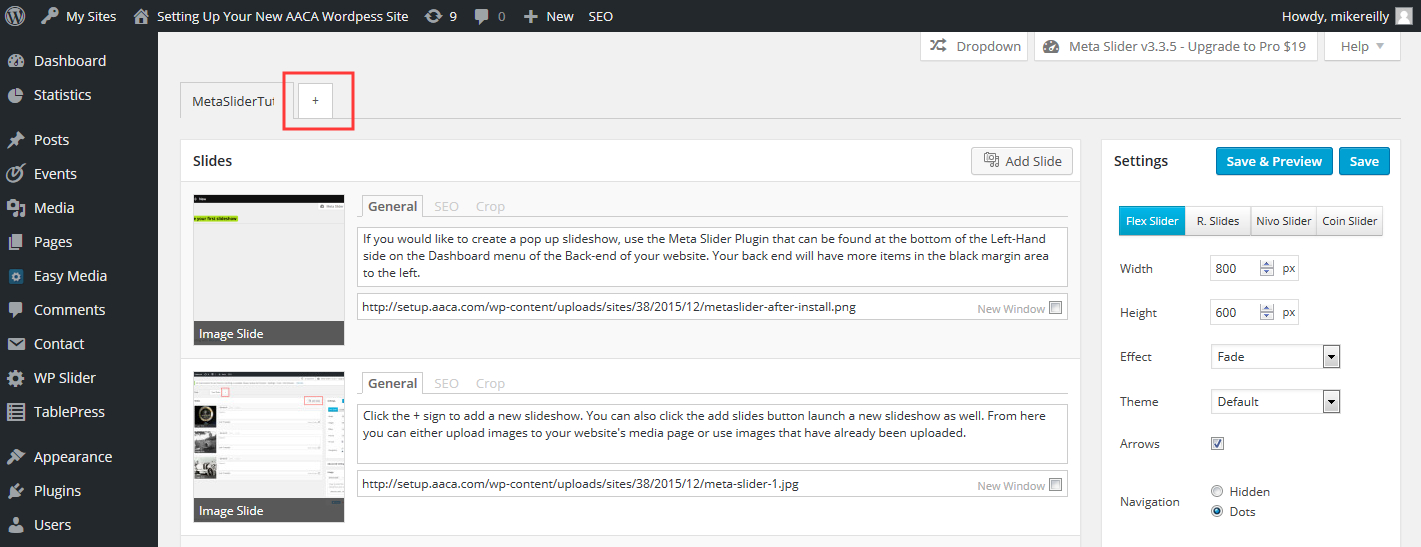
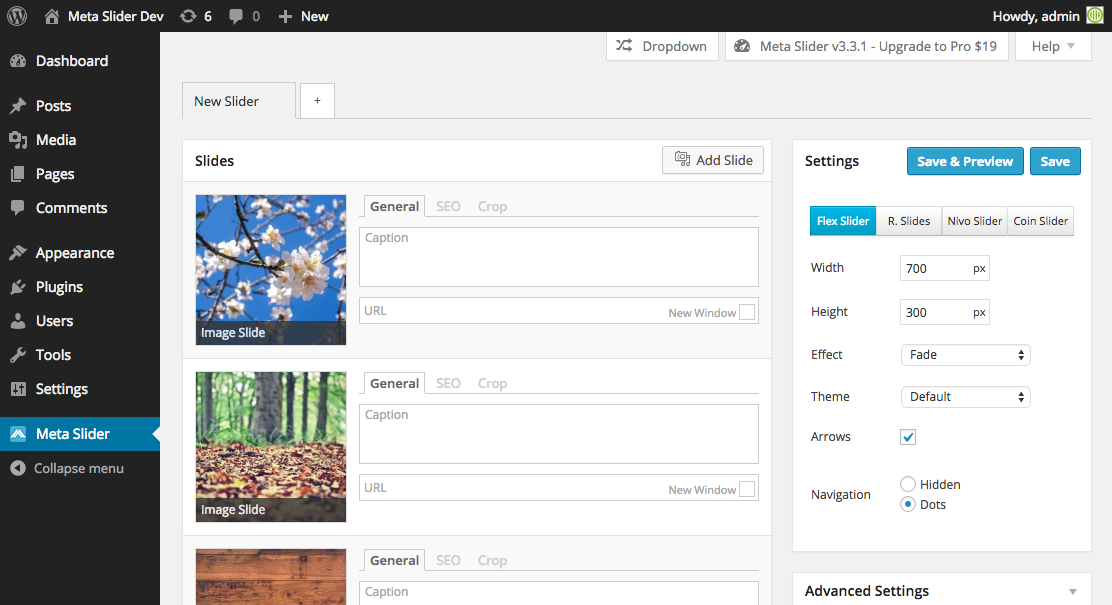
- If you have already used Meta Slider your page may look something like this. To create a new slide show click the + button near the top of the Meta Slider page.
- You have started the process and created a slideshow. After creating a new Slideshow you can rename it for easier organization by hovering over the title and clicking the pencil icon that appears. You can now begin to add photos/images to your slide show.
Adding Photos & Images to Your Slide Show
- After adding a new slide show click Add Slide to choose the photos that you want in your slide show.
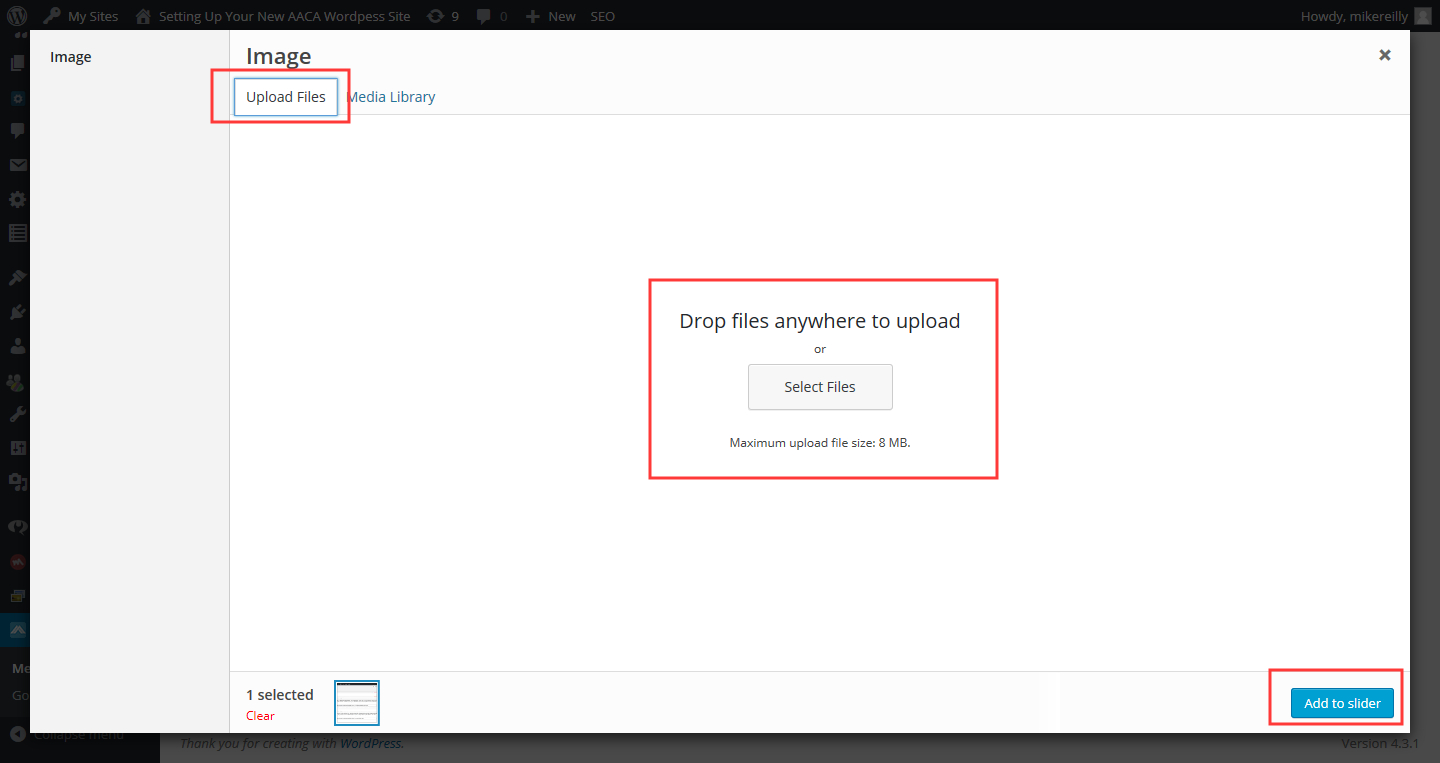
- To choose a photo that has already been uploaded to the Media section of your website find it in the Media Library and click/select it. You can hold the Ctrl key on the keyboard and click multiple photos. When you are done click the Add to Slider button in the bottom right hand corner. Alternatively you can click Upload Files for images that aren’t yet on your site.
- Click here to learn how to add and upload images/media to your website.
- If you haven’t uploaded the photos/images yet, you can upload and add them on this page by clicking the Upload Files button. From here you can either drag and drop items from your computer or click the select files button. When you are done click the Add to Slider button in the bottom right hand corner.
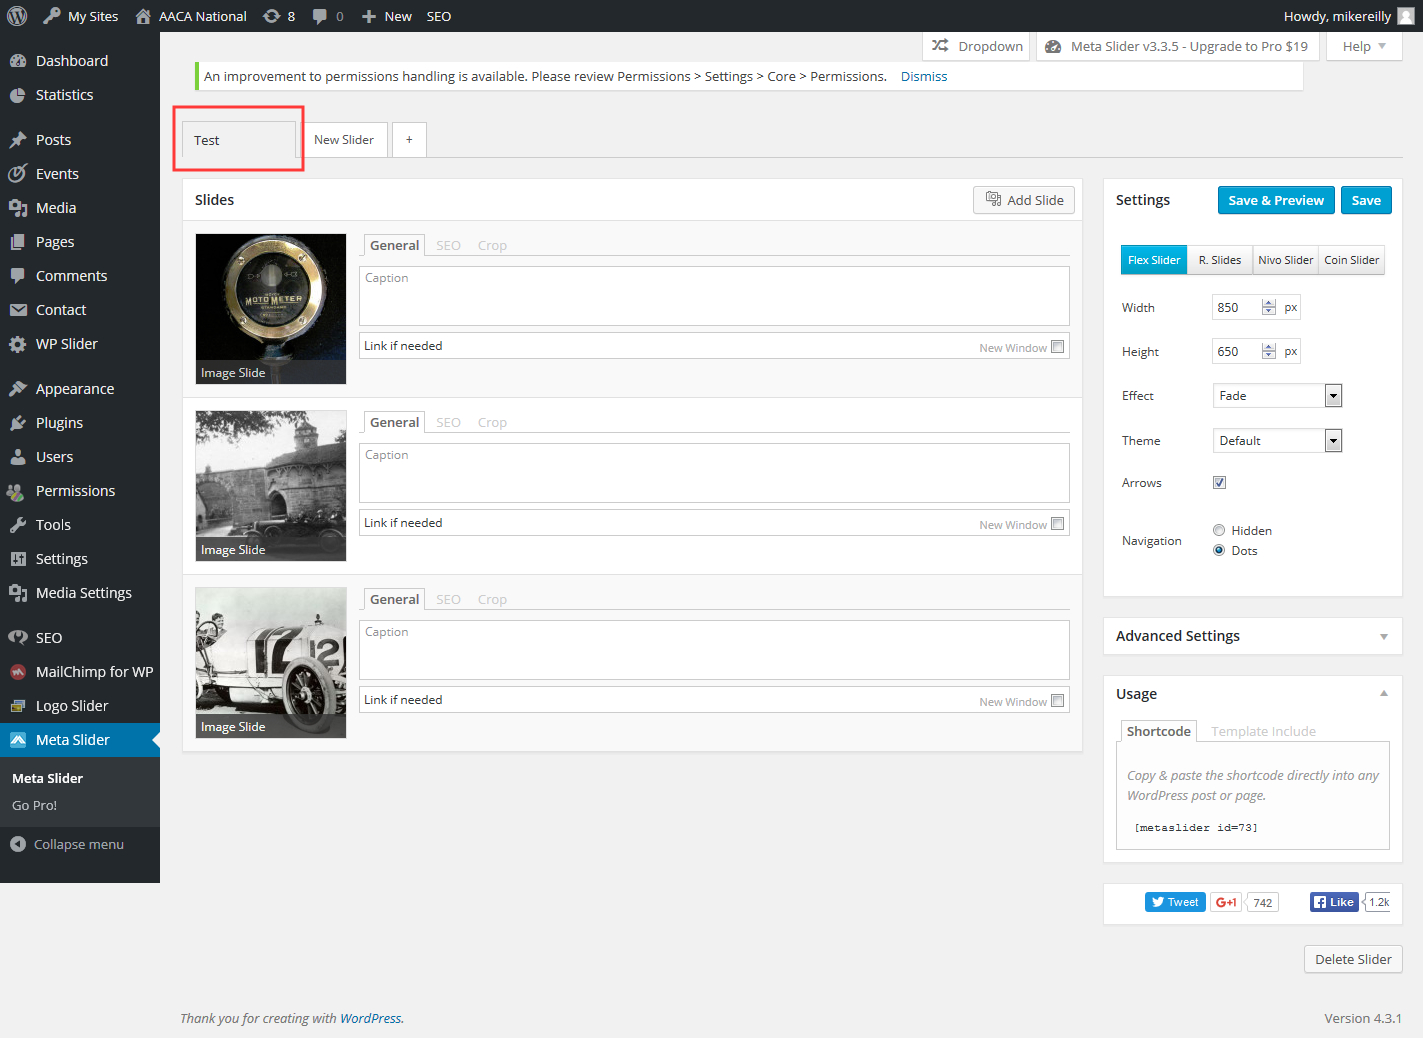
- After you upload or select the images you want in your slideshow they will show up on the slider page and this will be an example of the result.
- Repeat these steps if you need to add more photos. You can add and remove images from the slide show at any time.
Configuring the Look and Settings of Your Slide Show
- Once you have your images added and your slideshow is set up you can configure the look of the slideshow. This includes different transitions, times, and sizes of images.
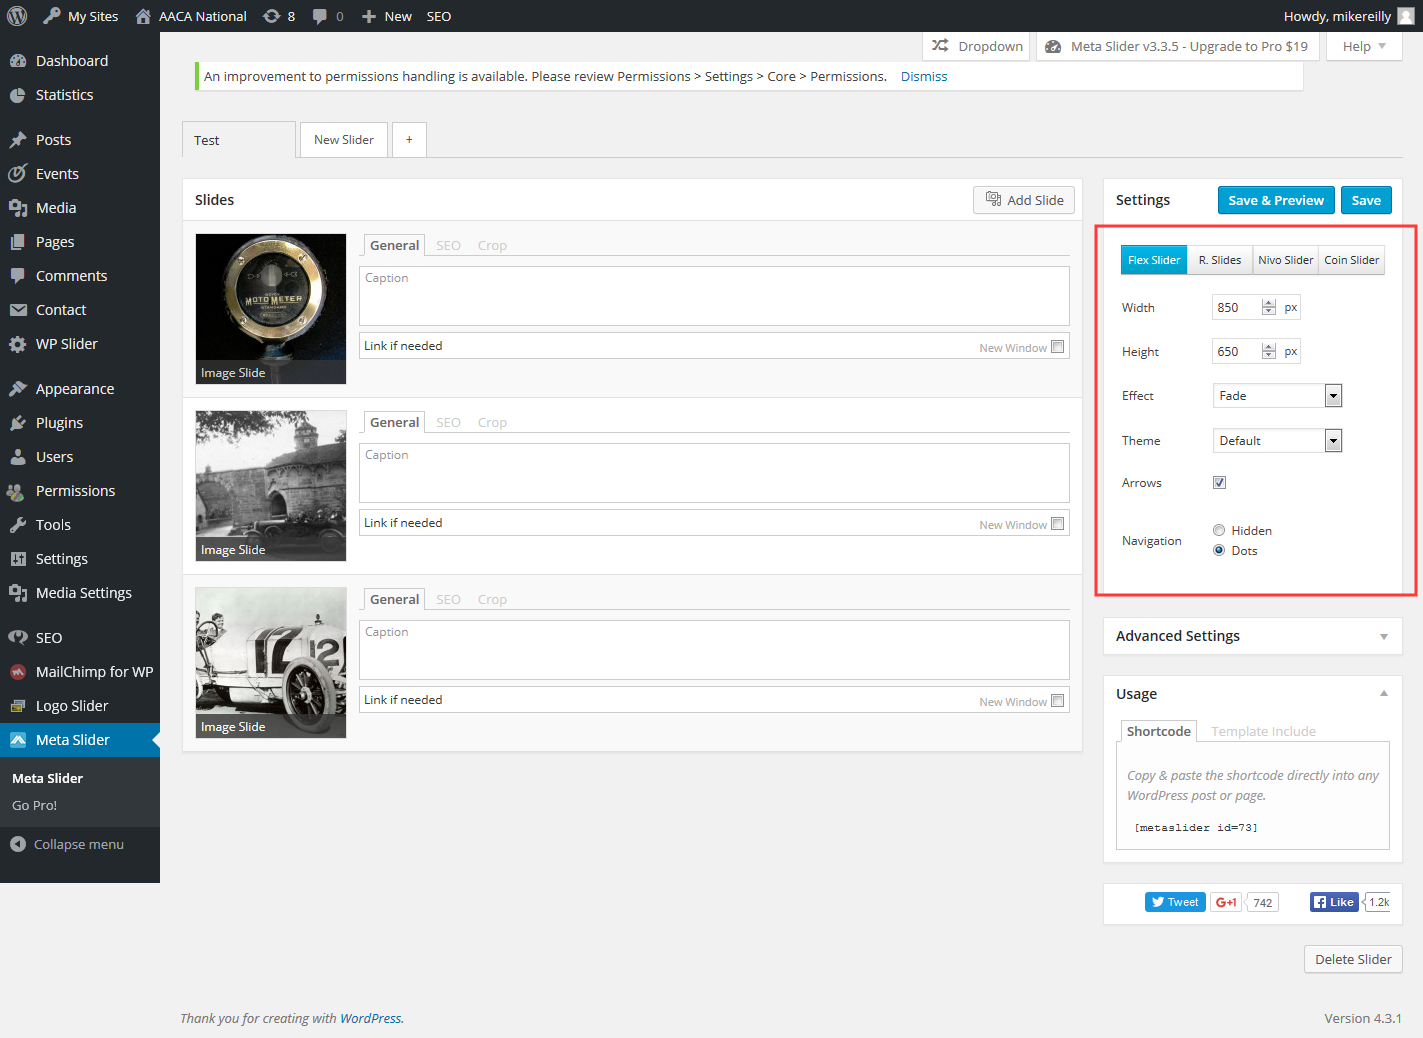
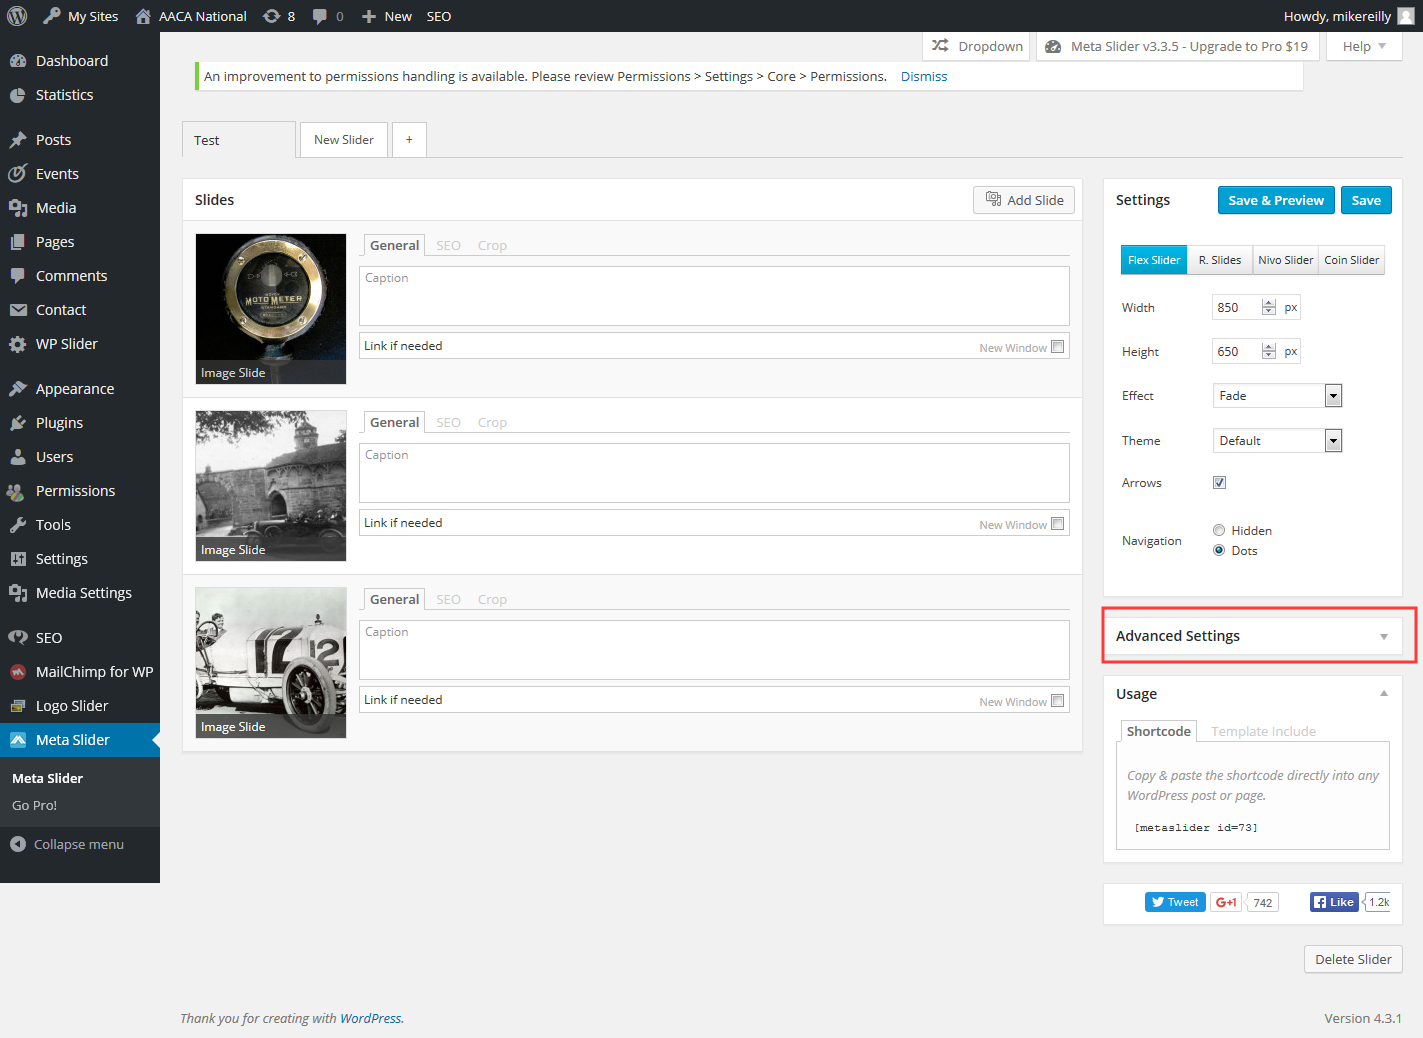
- By clicking the Advanced Settings tab on the right hand side you can configure even more settings.
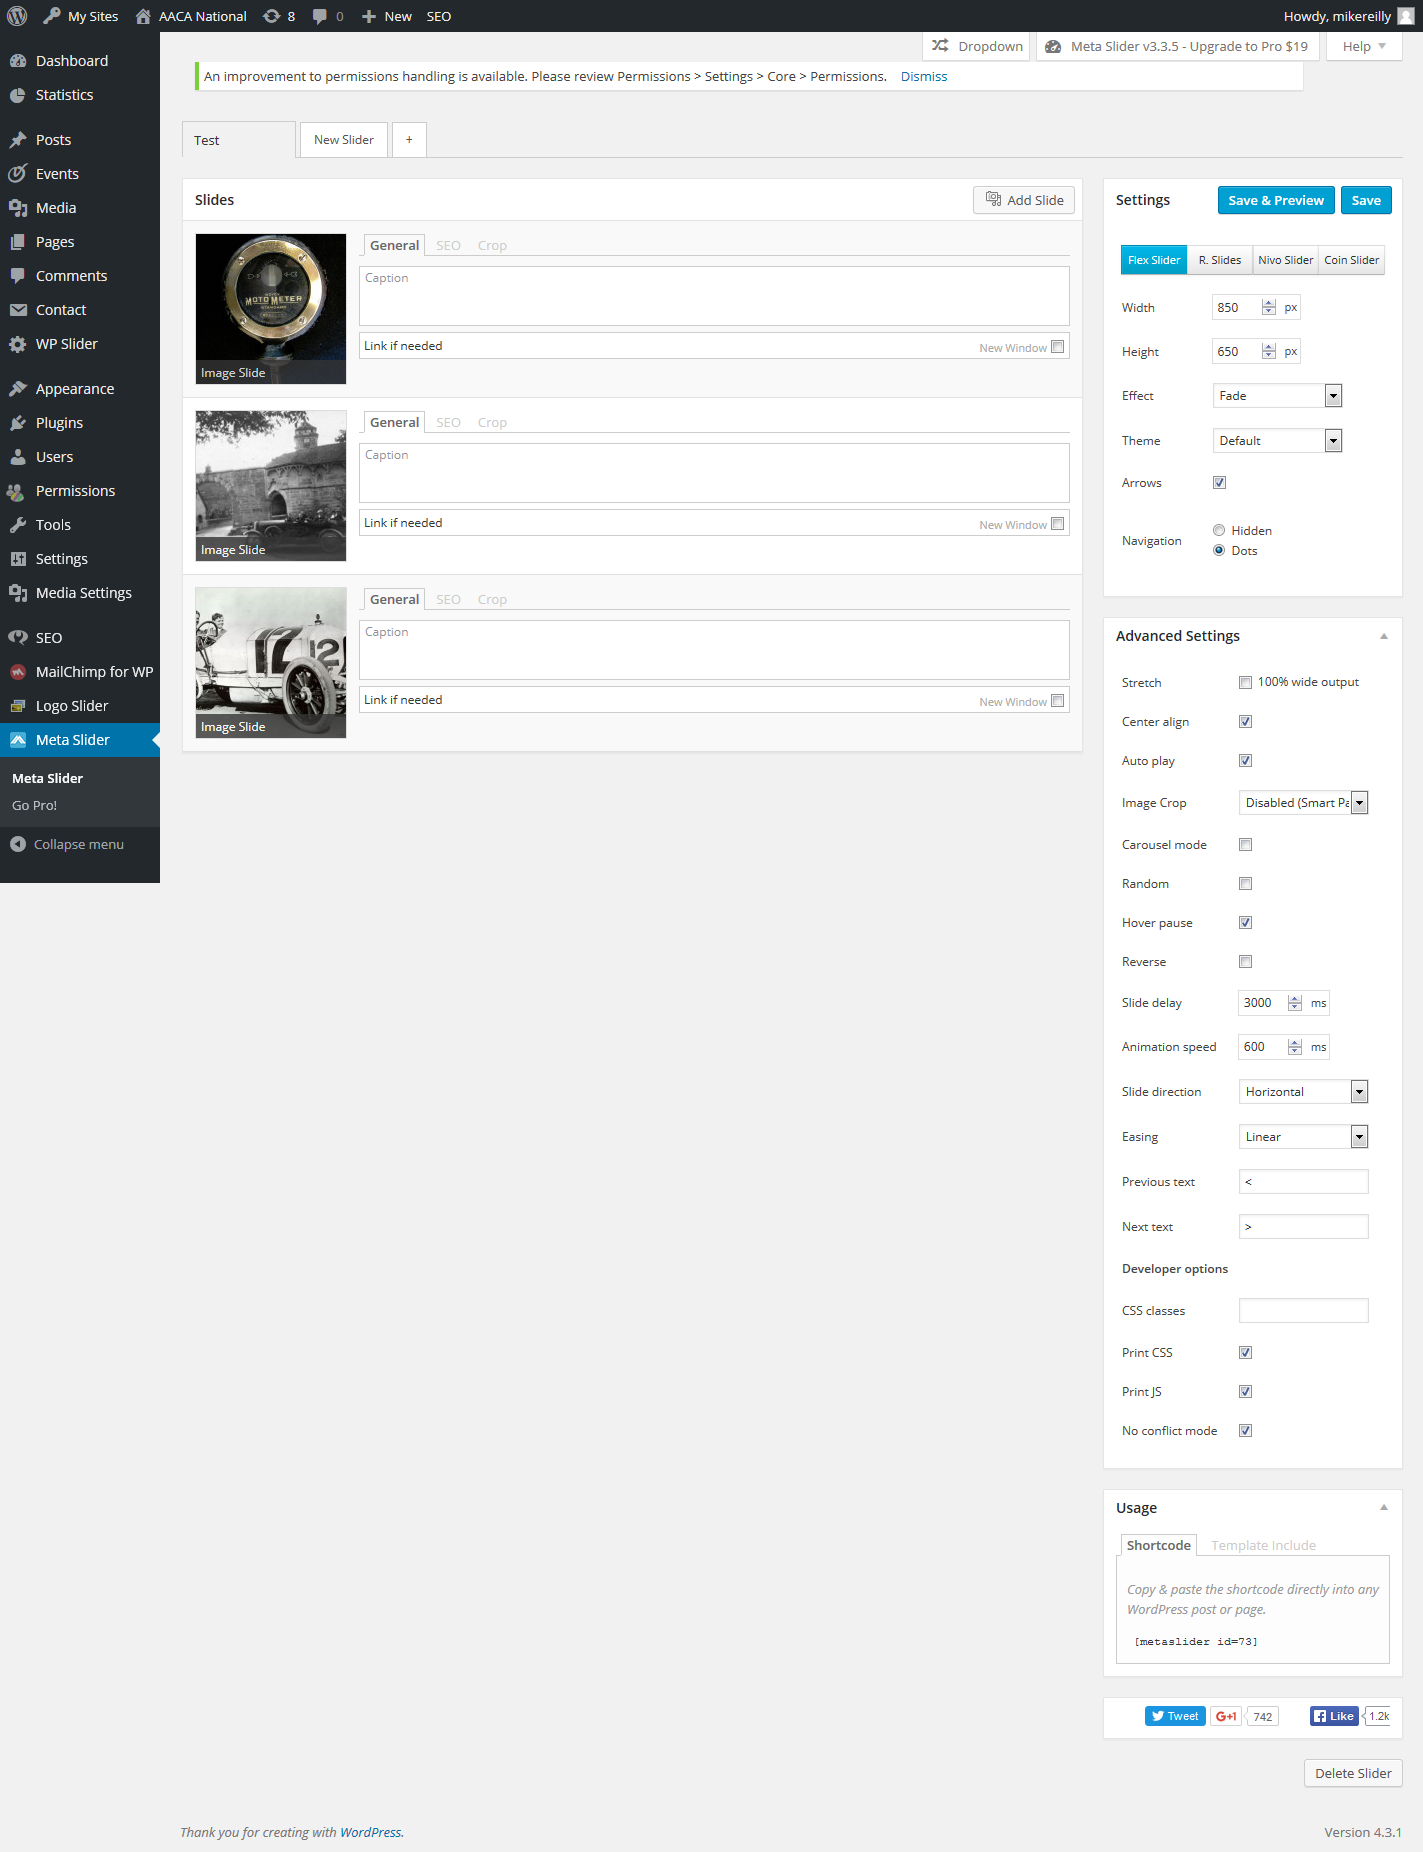
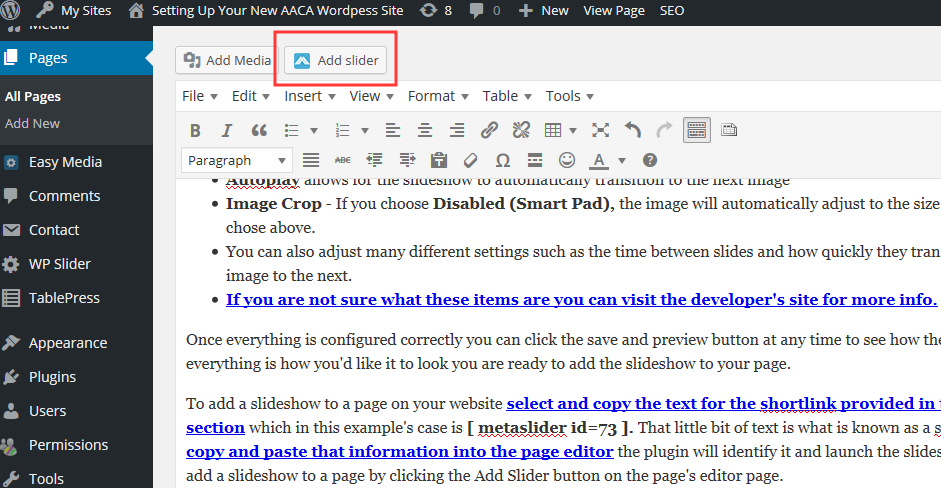
- You can Center the image by clicking Center Align. Autoplay allows for the slideshow to automatically transition to the next image Image Crop – If you choose Disabled (Smart Pad), the image will automatically adjust to the size parameters you chose above. You can also adjust many different settings such as the time between slides and how quickly they transition from one image to the next. If you are not sure what these items are you can visit the developer’s site for more info.
- Once everything is configured correctly you can click the save and preview button at any time to see how the slideshow looks. If everything is how you’d like it to look you are ready to add the slideshow to your page. The Save and Preview button saves your slide show while allowing to view the slide show. The Save button just saves without the preview.
- You are now ready to add the slideshow to one of your pages.
Adding a Slide Show to a Page
- To add a slideshow to a page on your website select and copy the text for the shortlink provided in the “Usage” section which in this example’s case is [ metaslider id=73 ]. That little bit of text is what is known as a shortcode link.
- When you copy and paste that information into the page editor the plugin will identify it and launch the slideshow and it will appear the same as the slideshow on this page.
- You can also add a slideshow to a page by clicking the Add Slider button on the page’s editor page.
- The Slide Show has now been added to your page. See below for an example.
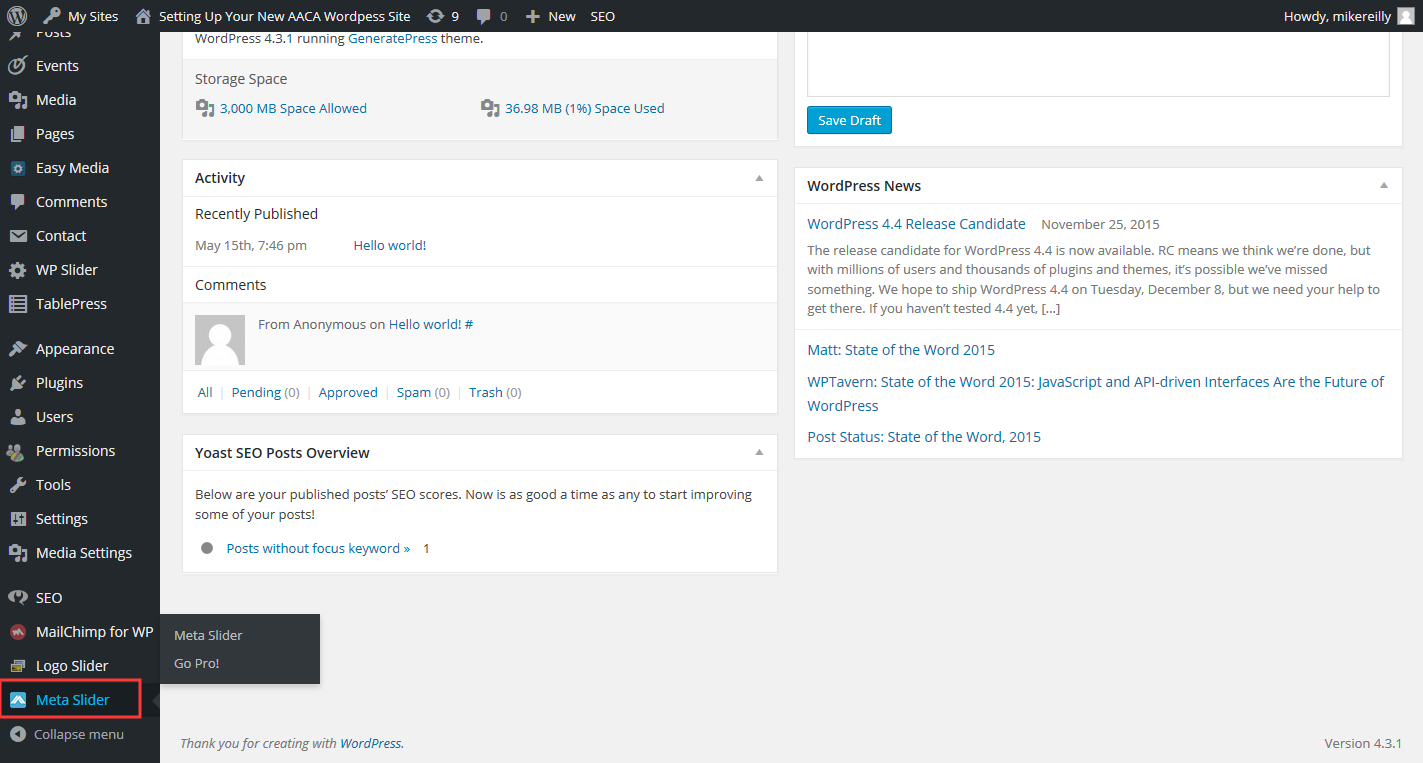 Scroll to the bottom of the Dashboard area and find the Meta Slider Plugin Tab and click the Meta Slider button.